You’ll be visiting QuickBooks Online’s Settings screen regularly, so it’s good to know what’s there.
You can get into a rental car and just start driving to your destination. But you soon realize that you need to know where the temperature controls and the radio tuner are. If it starts raining, you must know where the wiper controls are. And when it gets dark, you’d better know how to turn on the headlights.
The same goes for QuickBooks Online. You can create bills and start paying them or begin to invoice customers or record expenses as soon as you set up an account (though you’ll be adding a lot of data on the fly). But you’ll soon discover that those tasks would be easier if you had established all of your Settings first.
If you have multiple employees using QuickBooks Online, for example, it has probably occurred to you that not everyone needs to have access to everything in your company file. You’ll want to connect the site to your financial accounts, build a budget, and specify payment terms and types.
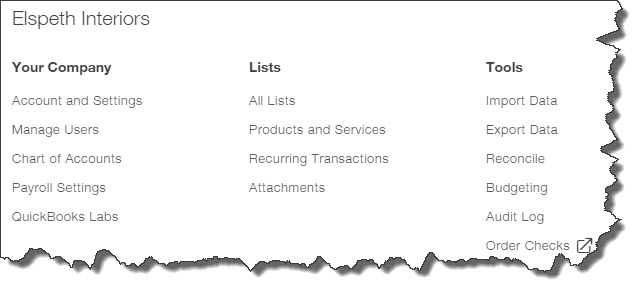
So it’s a good idea to visit your Settings screen early in your QuickBooks Online journey. It’s easy to find: just click the gear icon next to your company name in the upper right corner of the screen.
Figure 1: You’ll want to explore the Settings window early on in your use of QuickBooks Online, but you’ll often have occasion to revisit it.
Critical Functions
Some of the links in the Settings window take you to screens that you’ll have to pop into regularly in the course of your daily work. One that you’re likely to visit often is All Lists. Here, you’ll be able to complete tasks like:
- Creating records for the products and/or services that you sell.
- Setting up recurring transactions, regularly-scheduled invoices, bills, etc. that occur at periodic intervals. (Note: You can choose to either be reminded of these or let them be processed automatically. Please consult with us if you’re going to be using this feature, as it can create serious problems if it’s not set up exactly right.)
- Adding or modifying customer payment terms.
Unless you went through the QuickBooks Online setup process on your own or with help from us, it’s important that you click on the link to Account and Settings under Your Company before you start entering live data. QuickBooks Online comes with its own default settings that many businesses would be likely to use; but you need to evaluate these and see if you need to change any of them to better fit your company.
Going through these settings one by one has another benefit: you will learn about things that QuickBooks Online can do that you may not have discovered.
Figure 2: Work your way through the Account and Settings screens to see what QuickBooks Online can do – and to determine how you want to handle its many features for your company’s accounting.
It’s easy to specify your preferences on these screens. You just click on each tab on the left in succession and go through each setting, toggling between Off and On by clicking on the words and clicking on any buttons whose actions you want to explore.
During this process, you may have to make decisions that you’ve never before considered. For example, do you want to use custom fields or custom transaction numbers? We can schedule a time to go through this together if you’d like to make sure that you know what each option means and whether you should employ it.
Restricting Access
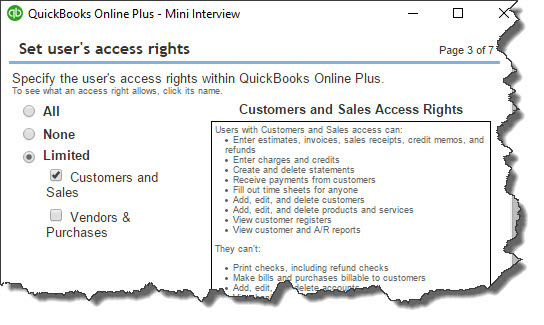
Will anyone besides you be using QuickBooks Online? If so, you’ll need to visit the Manage Users screen. Here, you can assign roles to users and specify what areas of the site they can access, as well as what they can do there. A simple wizard walks you through this critical process.
Figure 3: What limitations do you want to put on additional QuickBooks Online users?
There are many other Settings that you’ll likely want to visit at some point, like when you’re ready to create a budget or do your first account reconciliation. But we can’t stress enough the importance of establishing your accounting settings and defining user roles. Get the most out of QuickBooks Online by customizing it to meet your company’s unique needs.


